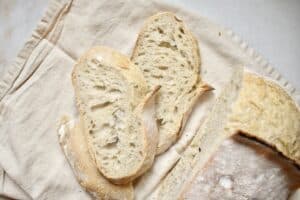
I’m a huge fan of sourdough baked goods for so many reasons. For one, the fermentation process really helps with the overall digestibility of the grains. In fact, almost all cultures that included grains as a huge part of their diets fermented them in order to make them more digestible.
What is even more exciting to me is the fact that it allows me to make bread without commercially produced yeast. One less thing to buy at the grocery store is one step closer to achieving self-sufficiency on our little homestead.
But sourdough baking can be intimidating if you’re not experienced with it. It was for me, until I finally bit the bullet and gave it a shot. In doing so I found that it wasn’t as scary as I thought and made some really delicious homemade bread.
Since I’ve been really involved in sourdough lately, what with baking season and all, I thought I’d start a series here at Plan to Eat and encourage y’all to give it a shot.
If you are going to bake with sourdough you must create a starter first. A good sourdough starter contains three things:
- acids
- yeasts
- bacteria
When flour, water, and air are given the proper conditions they will pick up bacteria either from an established starter culture you have purchased or from the surround area. Even if you purchase a dry established starter you will most likely end up with much of the bacteria and yeasts that exist in your area of the world.
Those bacteria that are picked up include some you may be familiar with like lactobacilli. These good bacteria feed on the starch in the flour and begin to produce acids. These acids give sourdough its tang and help in breaking down the hard-to-digest fibers innate in whole grains.
The yeast component of the sourdough starter is what we are really looking for if you want to create a risen sourdough bread loaf without any added commercial yeast. This is the reason that so many people tell you to throw out a bit of your starter before feeding it (by throw out I mean make pancakes or feed it to your chickens). By decreasing the volume of starter when you get ready to feed it, you are increasing the ratio of flour to starter which can help propagate more vigorous yeast organisms.
Create Your Own Sourdough Starter
You can purchase dried sourdough starters that incorporate with the flour and water in step one listed below. My latest starter is a result of that and I did find that it became vigorous much more quickly than the water-flour starters I established from scratch in the past. While it isn’t necessary, it does give you a bit of “insurance” in starting one.
My favorite source for these sourdough starters, including a rye-based and gluten-free starter, is Cultures for Health.
But it’s not as complicated as it sounds. You really only need to do a few simple steps:
- Combine about a cup of flour and a cup of water in a quart jar. Stir it vigorously with a wooden or plastic utensil, being sure that you incorporate plenty of air into the starter.
- Cover loosely with a clean towel and rubber band and place in a warm place for 12 hours. Repeat step one and all to sit, again, for 12 hours.
- Remove all but 1 cup of starter and feed again. Repeat every 12 hours until your starter is bubbling and active a few hours after feeding. In order to achieve a truly large colony of yeasts which will produce a well-risen loaf, you may want to give it at least seven days of feeding every 12 hours before using.
- You now have a usable sourdough starter for baking. Once it is well-established and vigorous you can begin feeding it only every 24 hours or store it in the refrigerator for up to a week between feedings. You will want to remove it from the refrigerator and feed it twice at least 12 hours before using it for baking.


