My husband’s mother, one of my biggest cheerleaders in cooking and life, gifted me a cookbook that originally belonged to her mother-in-law – The Service Cookbook by Mrs. Ida Bailey Allen (Copyright 1933). In addition to being a cookbook author, Mrs. Allen was the Home Economics Editor for Good Housekeeping and Woman’s World and hosted a radio show on the Columbia Network. Listeners could visit her New York City home to watch her staff develop and test new recipes. In that spirit, I’d like to think she’s smiling graciously at my adaptation of her recipe for ‘Cheese Biscuits’ using techniques for today’s cooking and baking.
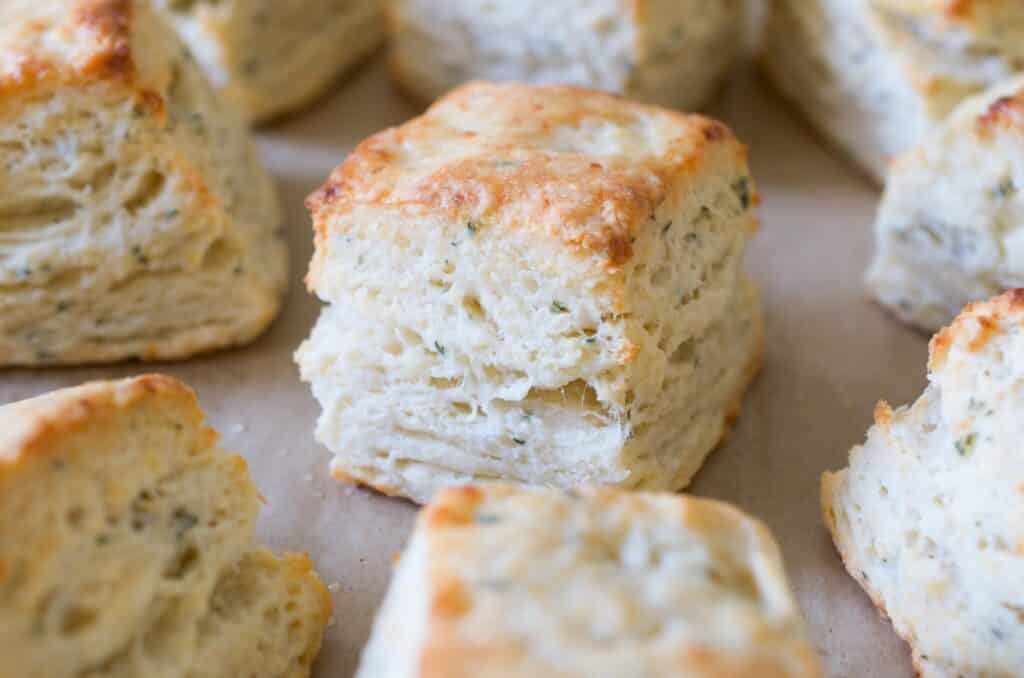
What I love about these parmesan biscuits is that each one has its own personality. They aren’t too precious, they’re imperfect and you can absolutely tell each is a homemade biscuit! As long as I have ingredients on hand, I can whip up a batch – there’s no need to do anything in advance, like freeze butter, which I would end up forgetting even if it was in my Plan to Eat prep notes. These savory biscuits are wonderful served alongside soup, casseroles, and saucy dishes…including your favorite pasta recipes.
Knowing how to make homemade biscuits from scratch is a valuable skill for many reasons! Once you nail the basic technique, a biscuit recipe offers versatility to your cooking repertoire. You get to control the ingredients, flavor them how you like, and adapt them for your dietary needs. Biscuit making is a great way to involve kids in the kitchen, too. They can measure, mix, and create shapes, then enjoy the delicious reward of their efforts.
Gather Your Ingredients for Parmesan & Thyme Buttermilk Biscuits
Mrs. Allen’s original recipe included shortening, regular milk, and American cheese – these have been swapped for butter, buttermilk, and parmesan.
- Unbleached, all-purpose flour – its protein content provides structure to the biscuits.
- Cake flour – cake flour is finely milled, softer, and has a lower protein content that contributes to a tender biscuit.
- Grated parmesan cheese – you can grate it yourself or use pre-grated. I opted for premium grated Parmigiano-Reggiano from the grocer’s cheese shop. The amount of cheese isn’t overpowering but provides a nutty, umami quality.
- Fresh thyme leaves – the thyme doesn’t hit you upfront. Instead, it builds slowly on the back of your tongue for a lovely herbal note.
- Baking powder – a leavening agent that will help to give the biscuits lift.
- Kosher salt and sugar – both are used for flavor balance.
- Baking soda – just a little is added to work in tandem with the baking powder and buttermilk to help the biscuits rise.
- Unsalted butter – butter contains water. When the biscuits hit the heat of the oven, the water in the butter will evaporate, creating trapped steam that also helps the biscuits rise.
- Whole buttermilk – provides a slightly tangy flavor, adds moisture and helps keep the biscuits tender.
What Equipment Do You Need?
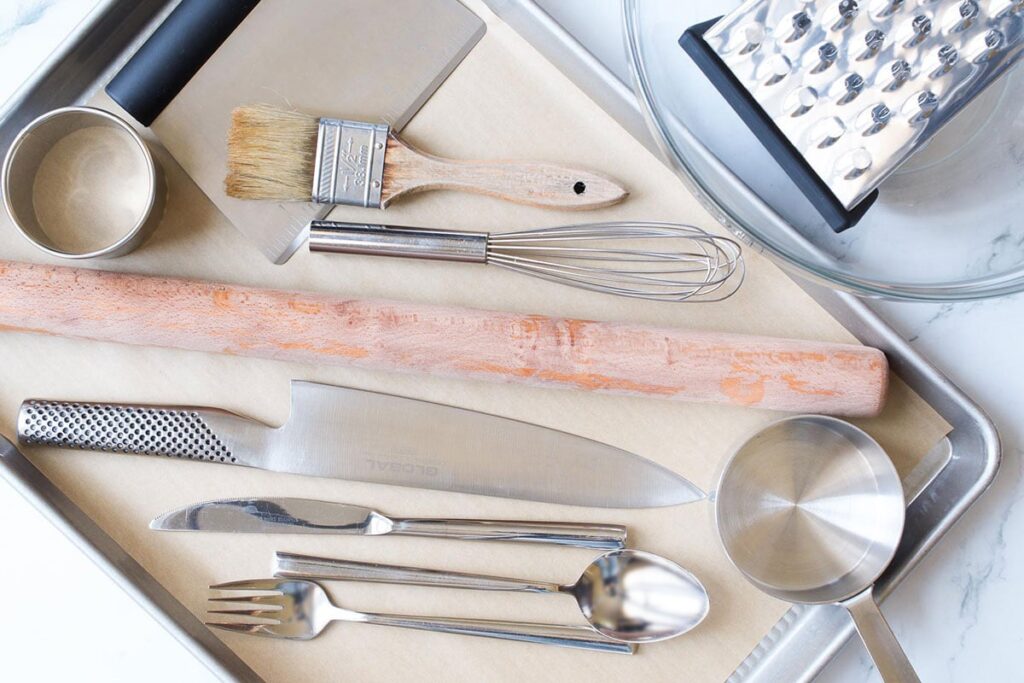
This recipe does not require a food processor, pastry cutter, or biscuit/cookie cutter (unless you want round biscuits); just a few gadgets that you probably already have:
- Large mixing bowl
- Fork (and/or a whisk)
- Dry and liquid measuring tools
- Box grater
- Rolling pin (a wine bottle works, too)
- Bench scraper (if you don’t have this, a square of cardboard will do the trick)
- Knife
- Pastry or basting brush
- Sheet pan
How to Make Homemade Buttermilk Biscuits
One thing biscuit makers agree on…use cold butter! After trying out various methods and best practices, I’ve adopted a series of steps and techniques that require only simple tools and a shelf in your refrigerator to ensure the butter is perfectly chilled when it hits the oven. All you have to remember is to keep your cold ingredients cold until it’s time to add them.
Mix the Biscuit Dough
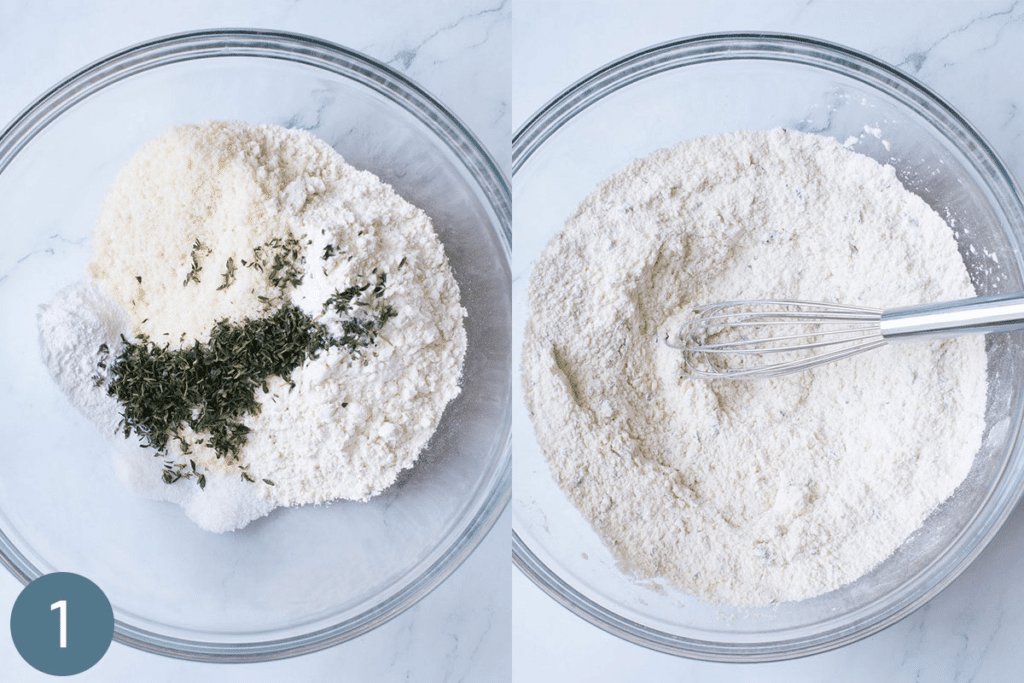
- Combine the dry ingredients in a large bowl using a whisk or fork. This includes both flours, grated cheese, fresh herbs, baking powder, salt, sugar, and baking soda.
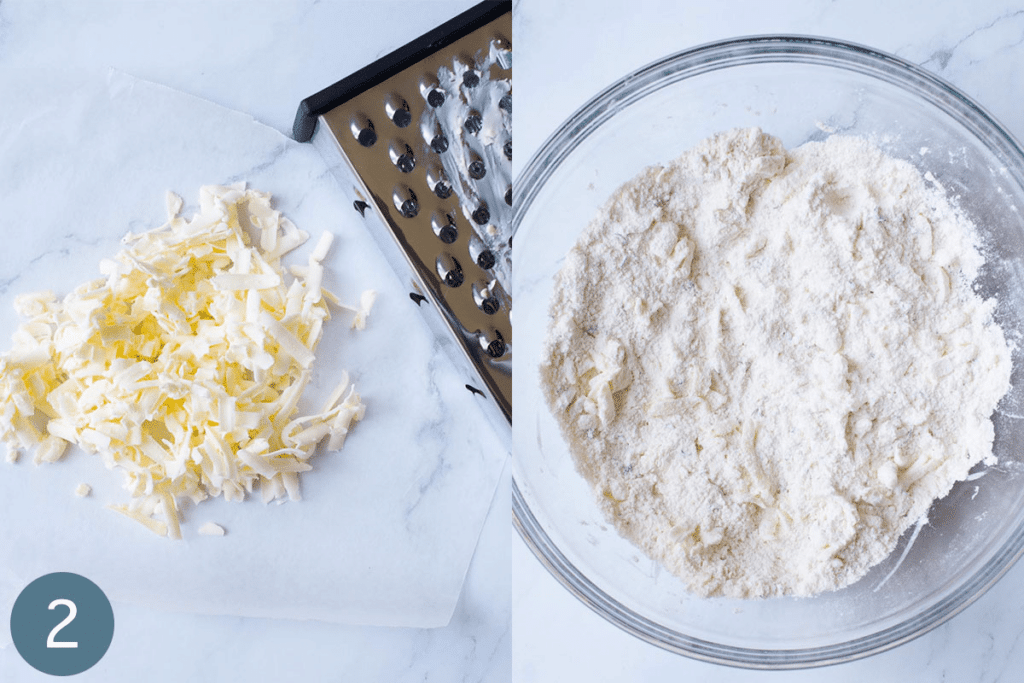
- Place the cold stick of butter on top of the flour mixture and roll to coat it lightly. This makes it much easier to handle; grate butter on the large holes of a box grater. Do this on top of a piece of wax or parchment paper so you can easily transfer the butter to the bowl of flour. Using clean hands, gently toss the butter with the flour to distribute and coat the pieces without working it in. It is ok to separate any pieces of butter that clump together.
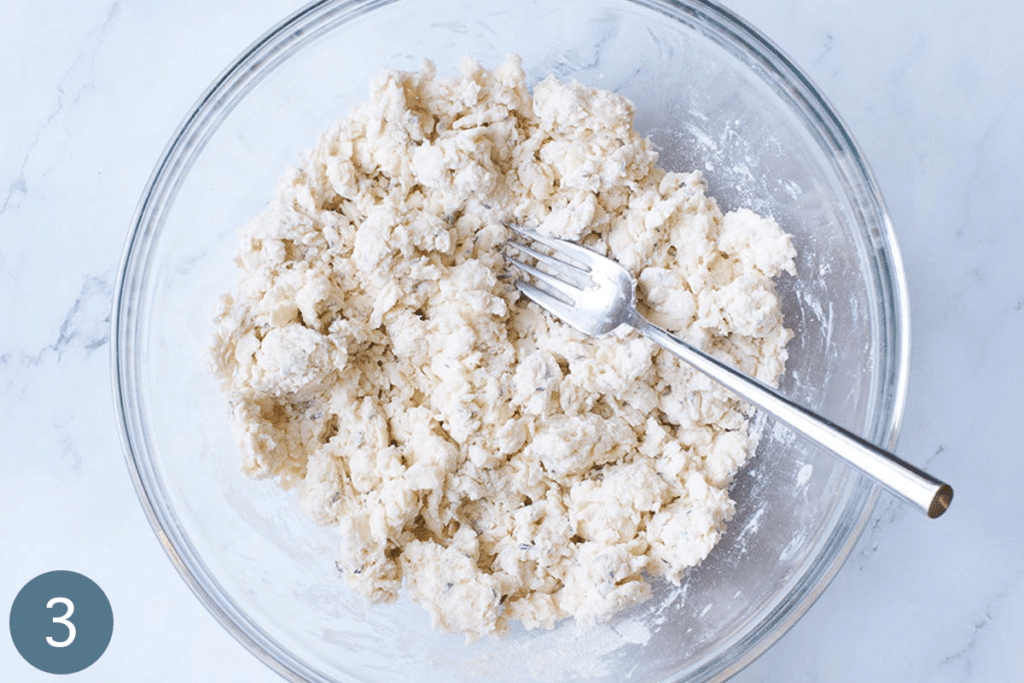
- Add the cold buttermilk a little at a time, using the fork to stir it in after each addition. After adding all the buttermilk, the result will be a somewhat dry and shaggy dough.
Create Biscuit Layers
Take your time and have patience with these next steps. With each fold-and-roll, you’re creating lots of layers while the strands of butter are flattening out and being incorporated. Use the bench scraper to gather and press dry bits into the edges of the dough along the way.
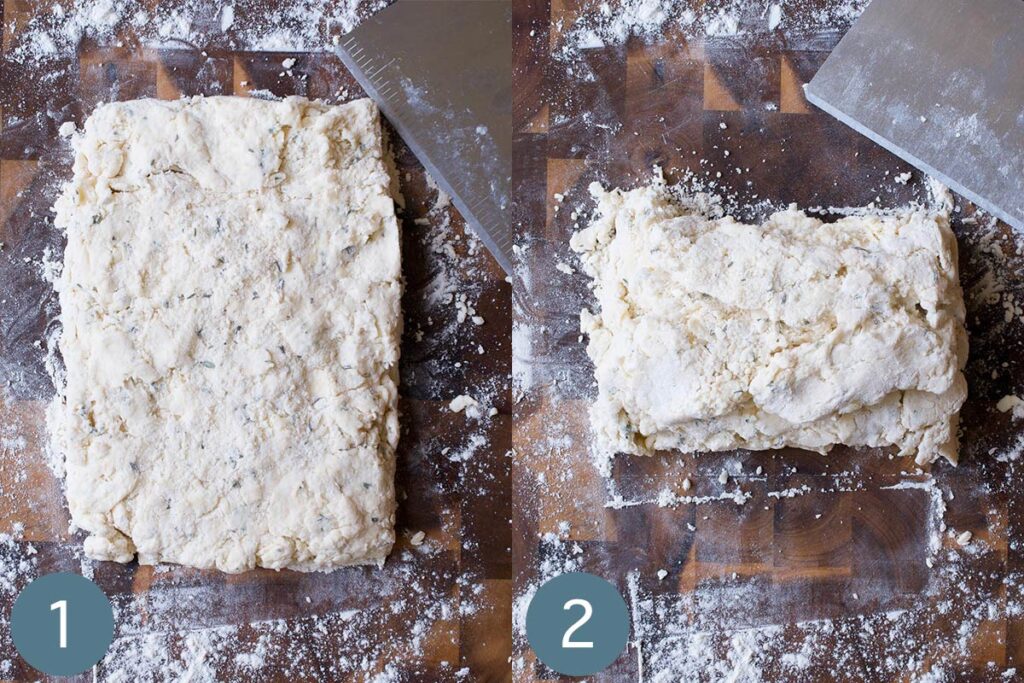
- Turn the dough out onto a lightly floured surface. With your hands and a bench scraper, gather and pat dough into a rectangle.
- Using the bench scraper, fold the dough into thirds like a letter.
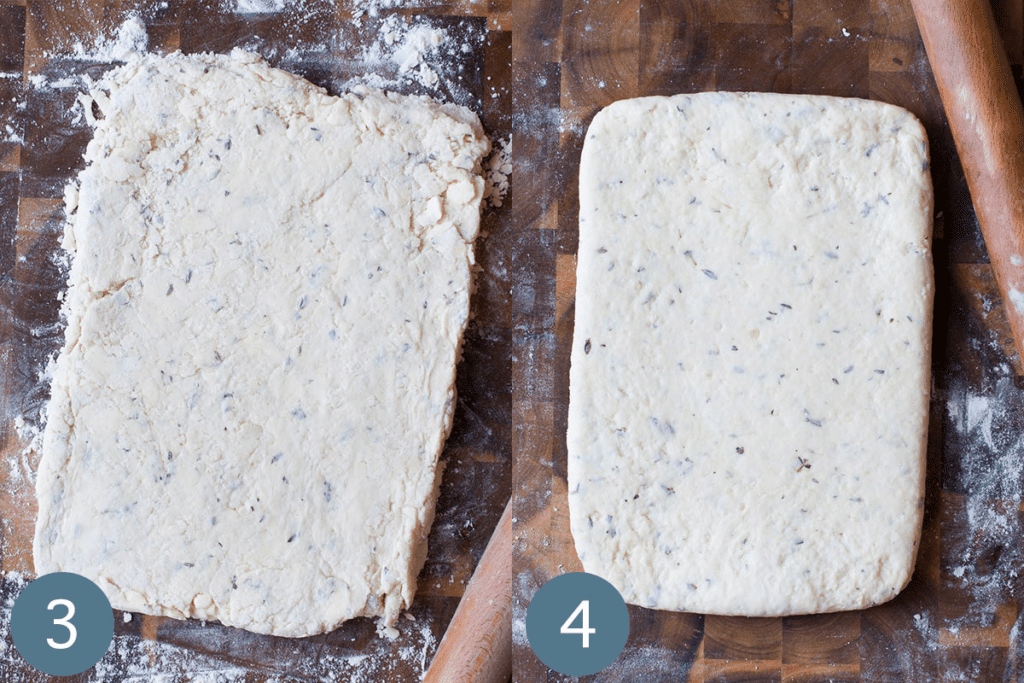
- Rotate the dough 1/4 turn, then use a rolling pin (dusted with additional flour), to roll dough into a rectangle again. Repeat steps 2 and 3 four more times!
- The final time, roll the dough into a 1-inch thick rectangle. The dough will be smooth, and you will still see clear pockets of butter. Use the bench scraper to square off the edges and corners as best you can.
- Transfer the dough to a parchment lined sheet pan, cover loosely with plastic wrap and refrigerate for 15 minutes to relax the dough and allow the butter to firm back up.
Cut and Bake Biscuits
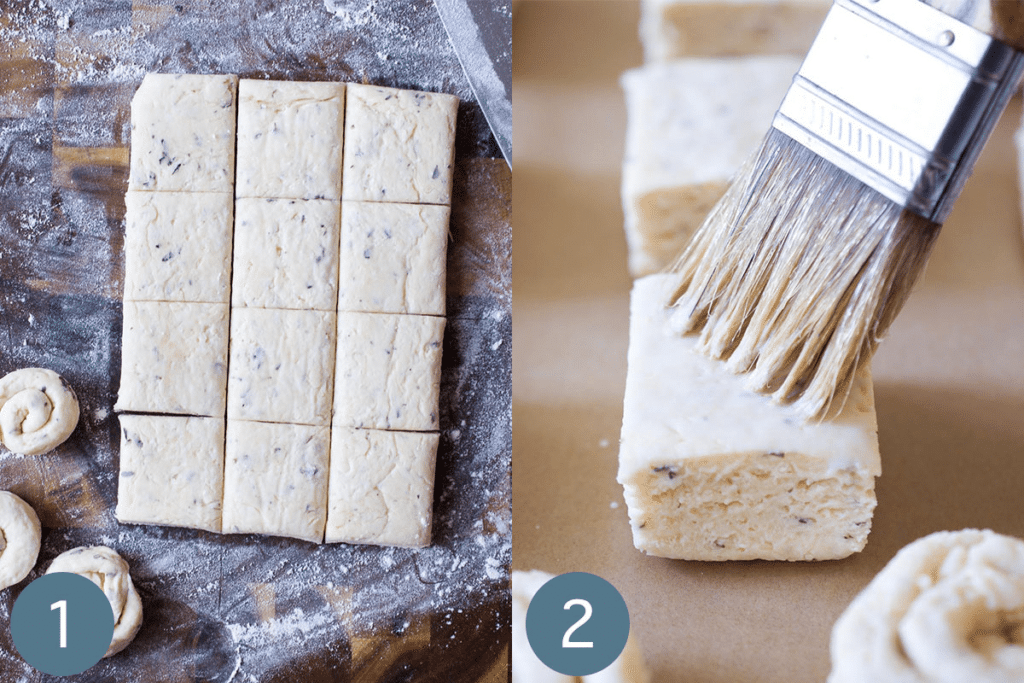
- Return the dough to a floured work surface. With a knife (or bench scraper), trim a 1/4-inch off each edge of the rectangle using an up-and-down motion. Then, cut biscuits in 12 equal portions (3 across / 4 down), using an up and down motion.
- Place biscuits back on the prepared baking sheet, spacing them 1-inch apart. Brush the tops with a little buttermilk (to promote browning), then bake for 15 minutes in a preheated 450°F oven until golden brown. (Roll the scraps and bake those alongside the biscuits for your baker’s share!)
- Brush the tops with melted butter as soon as they come out of the oven and allow to rest for 5 to 10 minutes.
Storing Biscuits
For already baked biscuits, transfer to an airtight container or zip-top bag and refrigerate up to 4 days, or freeze for one month (or up to 2 months, though results won’t be as good). To reheat leftover biscuits, wrap them loosely in aluminum foil and warm them in a 350°F oven until heated through.
To freeze raw biscuits, don’t brush the tops with buttermilk. Place cut biscuits on a parchment-lined sheet pan in the freezer for 4 hours. Transfer to a zip-top bag and return to the freezer for 2 to 3 months. Brush the tops with buttermilk (milk or melted butter) and bake from frozen in a preheated 450°F oven for 15 to 20 minutes until they’ve risen and are golden brown.
Additional Recipe Tips
- To measure flour, use a spoon to fluff up the flour in the container, then spoon it into a measuring cup. Use the back of a knife or a bench scraper to level it off.
- To make round biscuits, use a round cutter dusted in flour to cut biscuits using an up and down motion. Gather and press together any remaining dough to cut additional biscuits.
- Whether using a knife, bench scraper or biscuit cutter to cut biscuits, always use an up and down motion. Don’t drag or twist as that can seal the edges of the biscuit preventing them from rising evenly and revealing all those layers.
- Make sure your baking powder is fresh. Expired baking powder won’t yield lofty, layered biscuits. To test if your baking powder is still good, drop a small spoonful in a dish of hot water – it should bubble vigorously. If nothing happens, it’s time for a new can.
- For plain buttermilk biscuits, simply leave out the parmesan and thyme and you’ll have the best biscuits for honey and jam.
- Add 1/2 teaspoon of garlic powder or some black pepper to make them even more savory. Or, sprinkle on additional parmesan or some flaky sea salt after brushing the tops with melted butter.
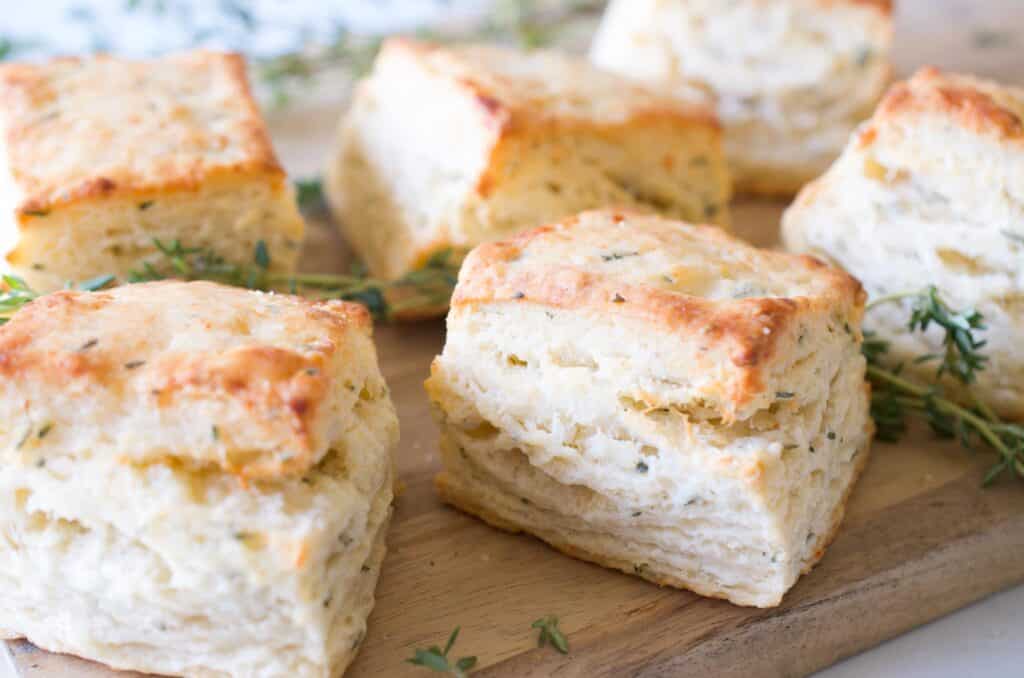
Parmesan and Thyme Buttermilk Biscuits are a delicious twist on the classic buttermilk biscuit resulting in irresistibly tender and flaky biscuits that will fill your kitchen with a tempting aroma!
Linda Feller has been a Plan to Eat superfan since 2013 and will whip out the app to share with anyone who expresses the least bit of interest. She is a recipe developer, food photographer and the gal behind Sip + Sanity, recipes for entertaining and celebrating.
FB | Instagram | Pinterest: @sipandsanity
Parmesan & Thyme Buttermilk Biscuits from Scratch
Adapted from Cheese Biscuits from 'The Service Cookbook' by Mrs. Ida Bailey Allen (Copyright 1933). In addition to being a cookbook author, Mrs. Allen was the Home Economics Editor for Good Housekeeping and Woman's World and hosted a radio show on the Columbia Network. Listeners could visit her New York City home to watch her staff develop and test new recipes. In that spirit, I'd like to think she's smiling graciously as I've adapted her original recipe using techniques for today's cooking and baking.
Source: Sip + Sanity | Linda Feller for Plan to Eat
Course: Breads
Prep Time: 50 min
Cook Time: 15 min
Total Time: 1 hr 5 min
Serves:
Ingredients
- 2 cups unbleached, all-purpose flour plus more for your work surface
- 1 cup cake flour
- 3⁄4 cup grated parmesan cheese (you can use premium grated Parmigiano-Reggiano)
- 2 tbsp fresh thyme leaves chopped
- 4 tsp baking powder
- 1 tsp sugar
- 1 tsp kosher salt
- 1⁄2 tsp baking soda
- 8 tbsp cold unsalted butter (1 stick)
- 1 cup cold whole buttermilk + 1 tbsp (and a little extra for brushing the biscuit tops)
- 2 tbsp unsalted butter melted
Directions
- Preheat oven to 450°F.
- In a large mixing bowl, whisk together the flours, parmesan, thyme, baking powder, sugar, salt, and baking soda until well distributed.
- Place the stick of butter on top of the flour mixture and roll to coat it lightly with the flour. (This will make it easier to handle.) Using the large holes on a box grater, grate the butter over a sheet of parchment or wax paper. Add the grated butter to the dry ingredients and toss to coat with flour and distribute throughout, *without* working it in. Do break apart any butter that has clumped together.
- Add the buttermilk (1 cup + 1 tbsp) a little at a time, stirring it into the flour with a fork. It will look rather dry and shaggy, and that is okay.
- Turn out onto a floured work surface. Using your hands and bench scraper, collect the dough together and gently pat it into a rectangle so one short end is nearest you.
- From the shorter ends, fold it into thirds (like a letter). Rotate one quarter turn so a short end is again nearest you. Use a rolling pin dusted with flour to gently roll the dough into a rectangle again (you may need to use the bend scraper to collect any errant dry bits and press them into the sides of the dough).
- (NOTE: You're creating many layers with each fold and roll, while the strands of butter are flattening and being incorporated. By the end of this process, the dough will be smooth, but you should still see clear pockets of butter.)
- Repeat the fold-rotate-and-roll process four more times (for a total of five). For the last roll, roll it out no less than 1-inch thick. Use the bench scraper to true up the edges and corners as much as possible.
- Transfer the dough to a parchment lined sheet pan and refrigerate for 15 minutes to allow the butter to firm back up. At the end of that time, return the dough to a floured work surface.
- For square biscuits: Use a sharp knife or bench scraper dusted with flour to trim a 1/4" piece off each side. Then, cut the dough into 9 equal biscuits, using an up and down motion; don't drag the knife. (Roll up the edge scraps and bake off for another use or the baker's share.)
- For round biscuits: dust a 2-1/2 inch round biscuit cutter with flour and cut out biscuit shapes using an up and down motion; don't twist the cutter. Collect the scraps and pat into a rectangle; cut additional biscuits. (Any remaining scraps can be baked off for another use.)
- Transfer biscuits to a parchment lined sheet pan, about 1-inch apart. Brush the tops with buttermilk. Bake for 13 to 15 minutes on the center rack. Rotate the pan halfway through.
- Brush melted butter over the tops as soon as they come out of the oven, but allow the biscuits to rest for 5 to 10 minutes before serving.


